|
QUARTER
MIDGET
CHASSIS SETUP MANUAL
(Updated
edition)
|

|

|
|
|
|
|
Laminated Gear Chart included

Click on Chart to Print
|
Spring Chart
and Cross Weight
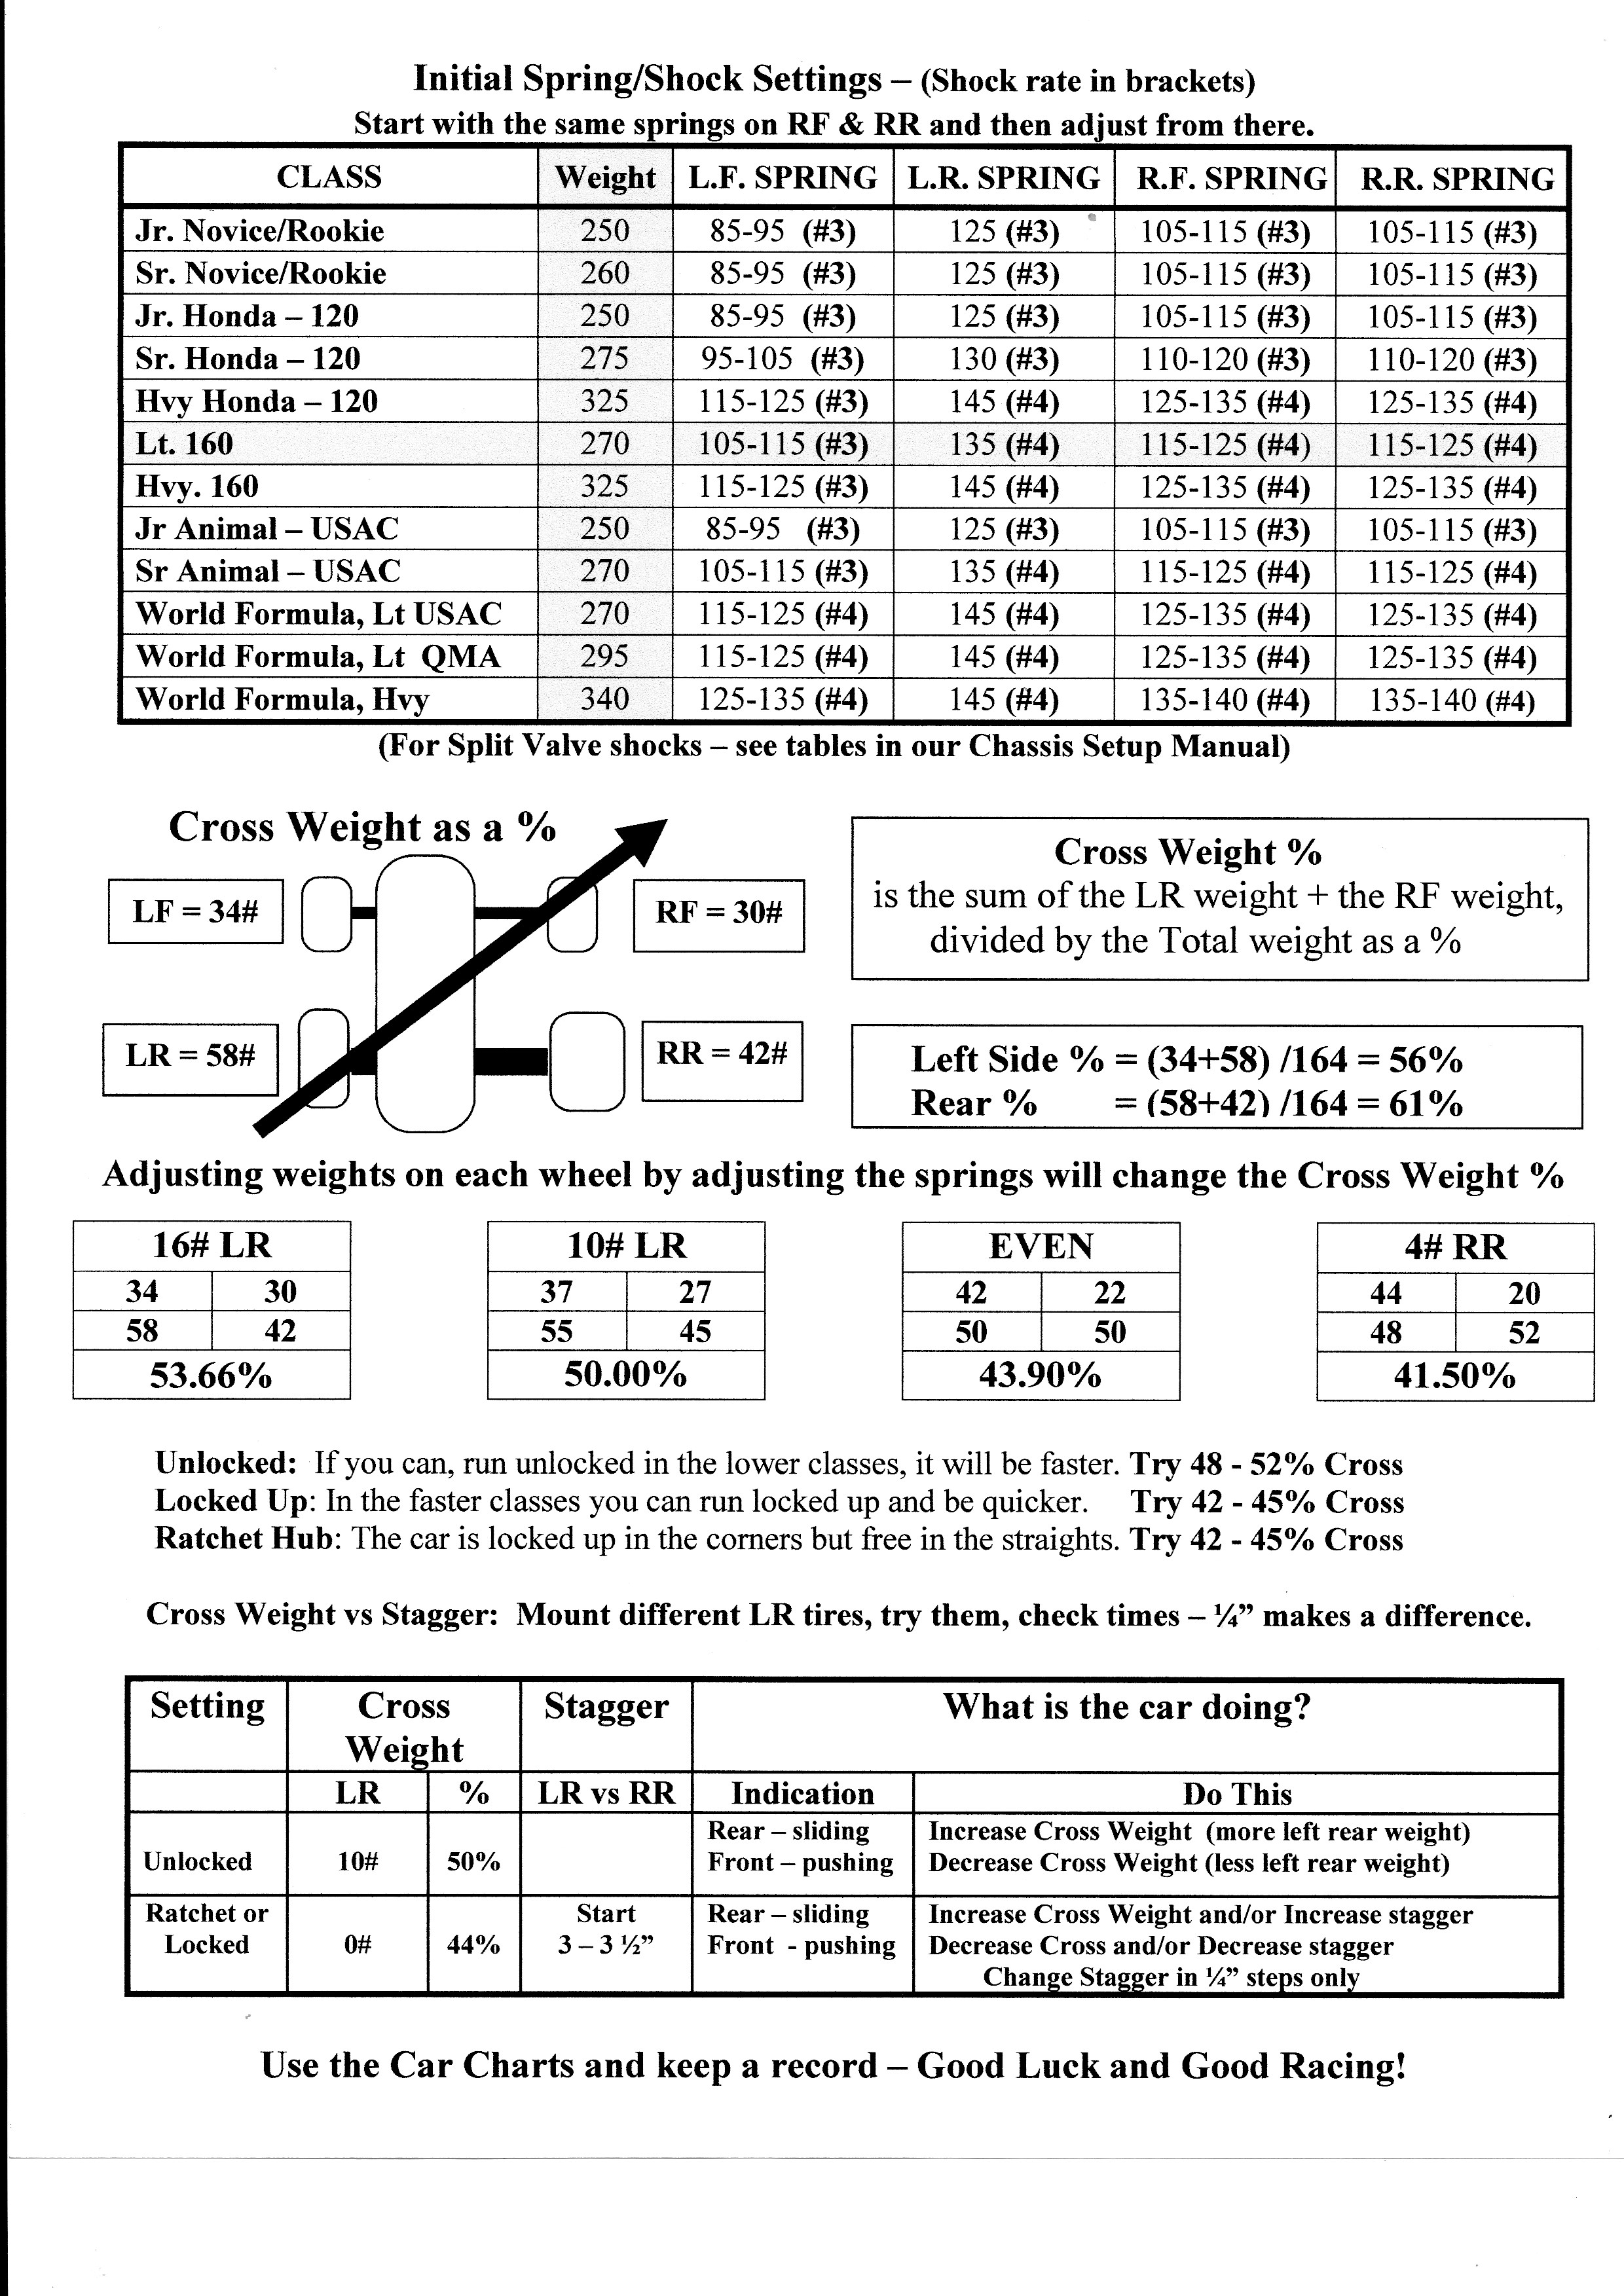
Click on Chart to Print
|
Basic Car Setup -- 10 steps to
going FAST
|
STEP 1 |
Squaring up the car, Lead and Ackerman Steering
|
| STEP 2 |
Front axle Camber, Caster and Toe-in Settings
|
| STEP 3 |
Tire Size and Compound
|
| STEP 4 |
Tire location, Stagger and Tire Pressure
|
| STEP 5 |
Ride Heights and Tilt
|
| STEP 6 |
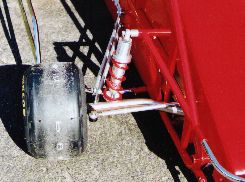
Coil Springs and Shocks
|
| STEP 7 |
Static Weight Settings and Cross Weights
|
| STEP 8 |
Panhard Bar Settings
|
| STEP 9 |
Dynamic Weight Transfer
|
| STEP 10 |
Track Testing - making it work on the track
|
-
Deluxe Loose
leaf Manual
-
32 pages of
detailed instructions
-
Complete Setup
for any Coil Car
-
Asphalt or
Dirt
-
Fully Indexed
so you can go right to the settings
Tire
Charts for Vega and Hoosier Shock
setting charts -
Car Charts for
track testing your car
-
Laminated Gear
Chart + Spring and Cross Weight settings
(Order this chart below - no charge)
|